How To Use Sticky Brick Labs Vaporizers (Complete Guide)
How To Use Sticky Brick Labs Vaporizers (Complete Guide)
Load it with some sticky-icky, and it’ll hit you like a brick: Sticky Brick vaporizers are convection butane vaporizers that stand in a league of their own. Hand-made in the United States by a team of dedicated artisans, Sticky Brick vapes combine the natural beauty of wood with the exceptional thermal properties of borosilicate glass. The result? Probably the hardest-hitting, best-tasting hand-made butane vaporizers on the market. Read our guide to learn everything you need to know about these unique beasts.
What is a Sticky Brick vaporizer?
Sticky Brick Labs vaporizers are a special class of butane vaporizers that offer gorgeous looks and face-melting hits of tasty convection vapour. Different from everything else you might have seen so far, Sticky Brick bodies are built out of blocks of wood that are kept together by powerful rare-earth magnets. The typical model is made of three wooden parts; the body itself, the bowl section and the heating block.
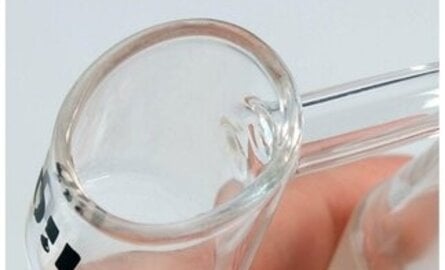
The mouthpiece and the flame intake, both made of thick borosilicate, fit into the wooden parts and are sealed by two heavy-duty orings. The working principle is simple: point a butane jet lighter’s flame towards the Brick’s intake, and inhale from the mouthpiece. Sticky Brick vaporizers hit real hard. In a Sticky Brick, it’s the hot air that extracts the vapour. There are no hot metal plates or other heat sources apart from hot air; Sticky Bricks are 100% convection vaporizers.

How do I use a Sticky Brick vaporizer?
Achieving the perfect hit with a Sticky Brick vaporizer requires some practice. Chances are you’ll combust your weed a couple of times, or find a little black spot in it. Nothing to worry about; this is part of the learning process. Just follow the tips below and, in no time, you’ll be able to produce dense, huge clouds of tasty vapour with no combustion whatsoever.
1. Grinding the herb
Sticky Brick Labs vaporizers will simply vaporize everything you throw at them, without too much of a problem. In general, though, they respond in a slightly different way to whole nugs vs ground herb. Grind your herb to a medium-coarse grind using a good quality grinder to experience a thorough extraction from the very first hit (usually you’ll be able to take 4 to 5 good hits per bowl with this technique).
Use a whole nug if you want to experience fantastic flavours over multiple hits, usually up to 6-7 per bowl. Use a nug that is small enough to fit in the bowl without being pressed, and allow some room for the air to flow in every part of the bowl. After the second or third hit, when you feel that the flavour is starting to have some toasty notes, break up the nug with a toothpick and vape some more.
2. Packing the bowl
If you are using ground herbs, pack the bowl loosely. Convection vaporizers such as the Sticky Bricks work best when the air can flow unrestricted through the herb. A medium-coarse grind will help you keep the screen at the bottom of the bowl clean for longer. Do not fully load the bowl; load it to about 3/4th of its capacity to allow some room for the expanding herb. A bowl holds approximately 0.4 grams of ground herbs. If you’ll be using whole nugs, make sure to leave some empty space between the nug and the sides of the bowl.
3. Using the lighter’s flame
Sticky Brick Labs vaporizers are 100% analogic, which means that the quality of the vapour extracted depends on your technique only. Fun! To get your first cloud of delicious vapour, first and foremost you’ll have to adjust the flame of your lighter. A flame that is approximately 1.5 cm long (measured from the nozzle to the tip of the light blue flame) works best. However, feel free to play around with the flame’s length, to some extent.
Second, keep in mind these three variables:
- Distance between the flame’s tip and the flame intake. This controls how fast the heat will build up in the bowl, and how hot the air pumped in the bowl will be. The closer the flame, the hotter. If you are using a 1.5 cm flame, its tip should just touch the flame intake. Play around with the distance to have different results.
- Draw speed. The draw speed controls the amount of fresh air that gets pumped through the bowl. In general, a slow draw will produce denser vapour, while a fast draw will ensure there are no hot spots in the bowl. Again, play around to find the perfect speed.
- Carb hole. On the lower section of the bowl block, you will find a small cork that plugs a hole: it is the carb hole. You may remove the cork and use a finger instead. As you inhale, you’ll be able to open the carb hole to let some additional cool air in the bowl to quickly decrease the temperature.
Lighter techniques
The quality of the vapour that comes out of the Sticky Brick vaporizer depends much on your technique. The objective is to have the densest, strongest vapour without combusting or generating hot spots. Apart from the three main variables mentioned above, there are other ways of controlling the magic that happens in the bowl. One of the most effective, is the lighter technique. The basic technique involves aiming the lighter straight into the intake. More advanced techniques involve moving the lighter in little circles, as if you wanted to heat up the rim of the heat intake. This helps avoiding heat spots.
Type of lighter
Sticky Brick Labs vaporizers can only be used with 100% pure butane jet lighters. The lighter greatly influences the vaporizer’s performance. When you buy a Sticky Brick, you’ll get a butane jet lighter included in the package. It is a good lighter, and it works great with Sticky Brick vapes; however, there are better lighters available. We prefer to use lighters with a fully-adjustable flame that is slightly wider than the one from the stock lighter. This ensures fewer hot spots and fuller, faster extractions.
4. Wait for the heat to build up
If you start pulling hard right from the start, you’ll not achieve the vapour quality you want. This happens because there is not enough time for the heat to build up in the bowl due to your draw pulling lots of cool air into the vape. Try this instead: wait for one or two seconds with the lighter’s flame pointing into the intake before taking a hit, then inhale. You’ll notice that the vapour is forming by looking at the vaporizer’s glass mouthpiece. When you see the white cloud flowing through the glass mouthpiece, you’ll know you are doing it right.
Keep the bowl’s temperature at vaping levels
You now know that it is important to wait a couple of seconds for the heat to build up in the bowl before inhaling at full speed. However, as soon as the vapour starts to form, you’ll have to draw harder, or you might have a little bit of combustion happening in the bowl. As a matter of fact, you can draw harder, OR move the lighter’s flame farther away OR open the carb hole (that you were keeping closed with a finger); all of these techniques will reduce the heat build-up in the bowl. Practice using them in combination for the best results.
5. Inhaling
You can keep inhaling from the vaporizer for as long as you want. Sticky Bricks are 100% on-demand vaporizers, which means you’ll get vapour as soon as you want it, for as long as you want it. Legend has it that some Sticky Brick pros can clear a bowl in one long draw. At the beginning, start with short draws of 5 seconds, hold the vapour in your lungs for 1 or 2 seconds, then exhale.
Draw speed
We found that the perfect hits come when you inhale slowly at the beginning of the draw, and you accelerate steadily throughout the draw. This allows for a nice heat build-up in the bowl, while ensuring no hot spots in the second half of the draw. It’s up to you to practice until you master the art of convection butane-powered vaping.
6. Repeating
A Sticky Brick bowl loaded with some good-quality herbs lasts for four to five hits, depending on the hits’ length. Feel free to take a break anytime you want. The wooden bowl will cool down as soon as you stop heating it up with the butane lighter, keeping the weed good for the next session.
7. Sessions
Sticky Brick Labs vaporizers can handle as much weed as you throw at them without giving any sign of fatigue. In a session, you could be vaping bowl after bowl without having to do anything apart from emptying it. If you feel that the airflow is not as good as it was in the first bowls, it is due to the metal screen at the bottom of the bowl being gunked-up by resin. Take out the screen with a pair of tweezers, and simply torch it clean with your jet flame lighter.

How to take care of my Sticky Brick vaporizer?
Sicky Brick vaporizers are durable and well-built. They are made with top-quality wood, thick borosilicate glass and thick, heat-resistant orings. Taking care of them is super easy; just follow these instructions.
First use
Sticky Brick Labs vaporizers are shipped ready for use. All of the oil used to condition the wood is 100% natural, food-grade walnut oil. The glass parts are also shipped clean (just rinse them quickly with running water and let them air-dry to remove dust particles. Pack a bowl and enjoy!
Routine cleaning
Sticky Brick Labs vaporizers require very little cleaning. As a matter of fact, the resin build-up in the bowl will make your vaporizer taste better and better with each use.
- After every use, simply empty the bowl
- If there are AVB (Already Vaped Bud – check out what you can do with it) traces in the bowl, simply use a tissue or a cloth to wipe it clean
- Torch the screen whenever you feel that the airflow is restricted
- Clean the glass parts by soaking them in alcohol for 15 minutes anytime you wish to have them shiny and transparent again, rinse them and let them air-dry
Deep cleaning
Every three to six months, depending on how often you use your Sticky Brick, you might want to do a deeper cleaning. Follow these steps if you wish to do a deep cleaning session.
- Disassemble the unit, separate all of the components.
- Put everything that’s made of glass in high-proof alcohol (ethanol works great if you can find it, otherwise rubbing alcohol works too) and let the parts soak for 15 minutes or so.
- Throw the orings in warm soapy water (dish washing soap works well) and let them soak.
- Throw the screen in alcohol, or torch it clean if you prefer.
- Clean the bowl and the air passages using a damp q-tip (damp, not soaked – use warm water without soap). Make sure you dry them well after (use a dry q-tip or a piece of cloth).
- Rinse the glass parts with lots of running water.
- Let the parts air-dry on a clean cloth.
- Once everything is clean and dry, slightly lubricate the orings with a food-grade oil or wax. We like using coconut oil for this purpose.
Conditioning the wood
After the deep cleaning, you might want to condition the wood with a food-grade oil. Oil nourishes the wood, brings back the true colours and grain, and helps to extend the life of your vape. You can condition the wooden parts with coconut oil, just follow these steps:
- Apply the coconut oil generously on each and every wooden part, including the bowl
- Let sit overnight on a clean cloth
- The following day, remove the excess oil with a clean, dry cloth
Spare parts
Sticky Brick Labs vaporizers are extremely durable. Just pay attention to the glass parts, and with a little care and maintenance, your Sticky Brick could easily last a lifetime. The Bricks come with spare orings and screens when you purchase them; however, it could be a good idea to purchase a spare mouthpiece and a spare air intake if you have ‘greasy’ hands.

What can I vape in a Sticky Brick?
Sticky Brick Labs vapes work great with dry herbs. Nothing stops you from using them with hash, rosin, oils or other concentrates. To use hash in your Brick, just break it down into little pieces as you would for a joint, and fill the bowl with pure hash. You can also use a hash-weed mixture for extra flavour and potency. To vape concentrates and oils, you can use Sticky Brick’s concentrate pads (sold separately), or use a little bit of vape wool. You can also mix the concentrates with weed. We like sprinkling weed bowls with kief and add a little ball of rosin on top.
Which Sticky Brick model is right for me?
The Sticky Brick Labs collection consists of many different models, each one with a different personality. These below are the main Sticky Brick models, and the ones that we at Bongify love the most:
The Flip Brick
The tiniest and cheapest Brick in the family, the Flip Brick sure packs a punch. It is made of just the bowl and the heat intake, and sports a 14 mm male adapter at the bottom. This model is especially designed to work best with bongs, or J-hooks if you prefer to vaporize without water filtration. It’s the perfect brick for you if you mostly vape through water.
The Junior
The Junior is one of the most popular Sticky Bricks. It is designed to fit in its wooden sleeve, and it is small enough to be taken wherever you want. While it might not be a good idea to use a butane vaporizer among a bunch of strangers, vaping in a park or a secret stoner spot sure sounds like fun. The Jr. is the perfect brick if you plan to vape on the go.
The OG
The bad boy that gave life to each and every other Sticky Brick model; OG stands for original. It’s wide mouthpiece and generous bowl ensure massive hits of delicious vapour. This beautiful piece of craftmanship is capable of delivering some of the strongest hits possible. Choose an OG if you like massive clouds of vapour with no water filtration.
The Runt
Our personal favourite. The Runt falls somewhere in between the Junior and the OG in terms of size. Its main feature is a easy-to-use bowl that can be filled and emptied very quickly. Go for the Runt if you like long vaping sessions with multiple bowls and many different weed strains.
How can I upgrade my Sticky Brick?
The vaping community simply loves Sticky Brick Labs vaporizers, and this gave life to a wide variety of accessories that you can purchase to upgrade your device. Concentrate pads, modified mouthpieces and bubblers are only a few of the options you have to upgrade your favourite Brick. Take a look at the most popular accessories for Sticky Brick vaporizers.
Mini Bubbler
Suitable for the Junior and Runt models, the mini bubbler is hand-made in the USA using the thickest borosilicate glass possible. This little thing is a champ: it does an amazingly good job at cooling down and moisturizing the vapour for a bubbler its size. It holds just a tiny bit of water, has a splash guard, and a bent mouthpiece that significantly increases the glass airpath through which the vapour flows. Result? Massive hits that are easy on the throat.
U-joint
U-joints are specially designed for you to use the Runt and the Junior models with your favourite waterpipe. There might be times in which the mini bubbler is just not enough for your vapour-cooling needs (for example if you vape hash or concentrates). This is when the u-joint steps in; equip your Brick with it, and you’ll be able to use any 14 mm female bong you like.
Water filtration
Adding water filtration to your Sticky Brick setup is, to put it simply, the best thing you can do. Water will moisturize and cool down the vapour, as well as filtering the tiny bits of herb that make it past the screen. The bongs that work best in combination with Sticky Brick vaporizers are medium-sized recyclers such as this Bird Cage recycler by Black Leaf.